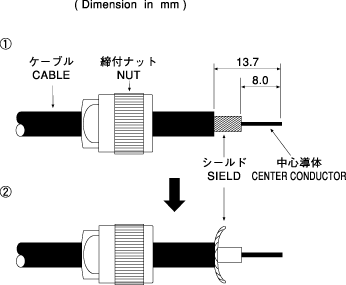
Place nut over the cable jacket, and remove outer jacket, shield conductor and dielectric as shown in figure 1.

Separate the shield conductor symmetrically in two, and twist them firmly.
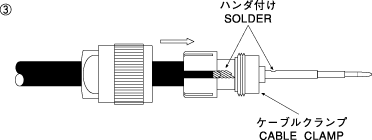
Insert the cable into the cable clamp, leading the separated two shield conductors into both slits of the cable clamp. Butting the cable into the cable clamp softly, solder the center conductor. Trim the shield conductor to suitable length to be soldered shown, and solder them on the cable clamp as shown in figure 3. (Being soldered horizontally straight over the cable clamp as shown in this figure becomes stronger tensile strength.)

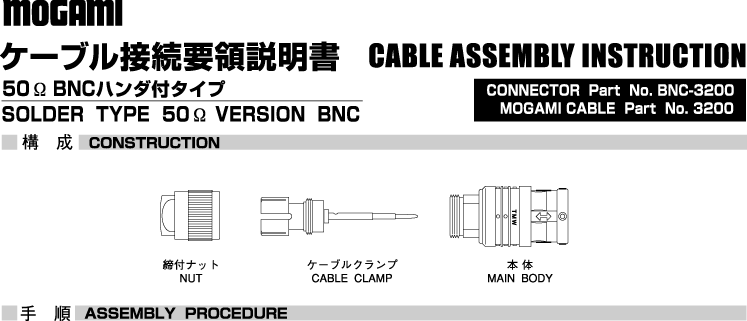
Screw the main body onto the assembled cable clamp. Then, lock the nut by a wrench(8mm/0.315in) to the end.

Finish.

